How To Add Clients to TeamCare
Last updated: June 3, 2026
Below are the steps to add new clients into TeamCare and into our Install Pipeline.
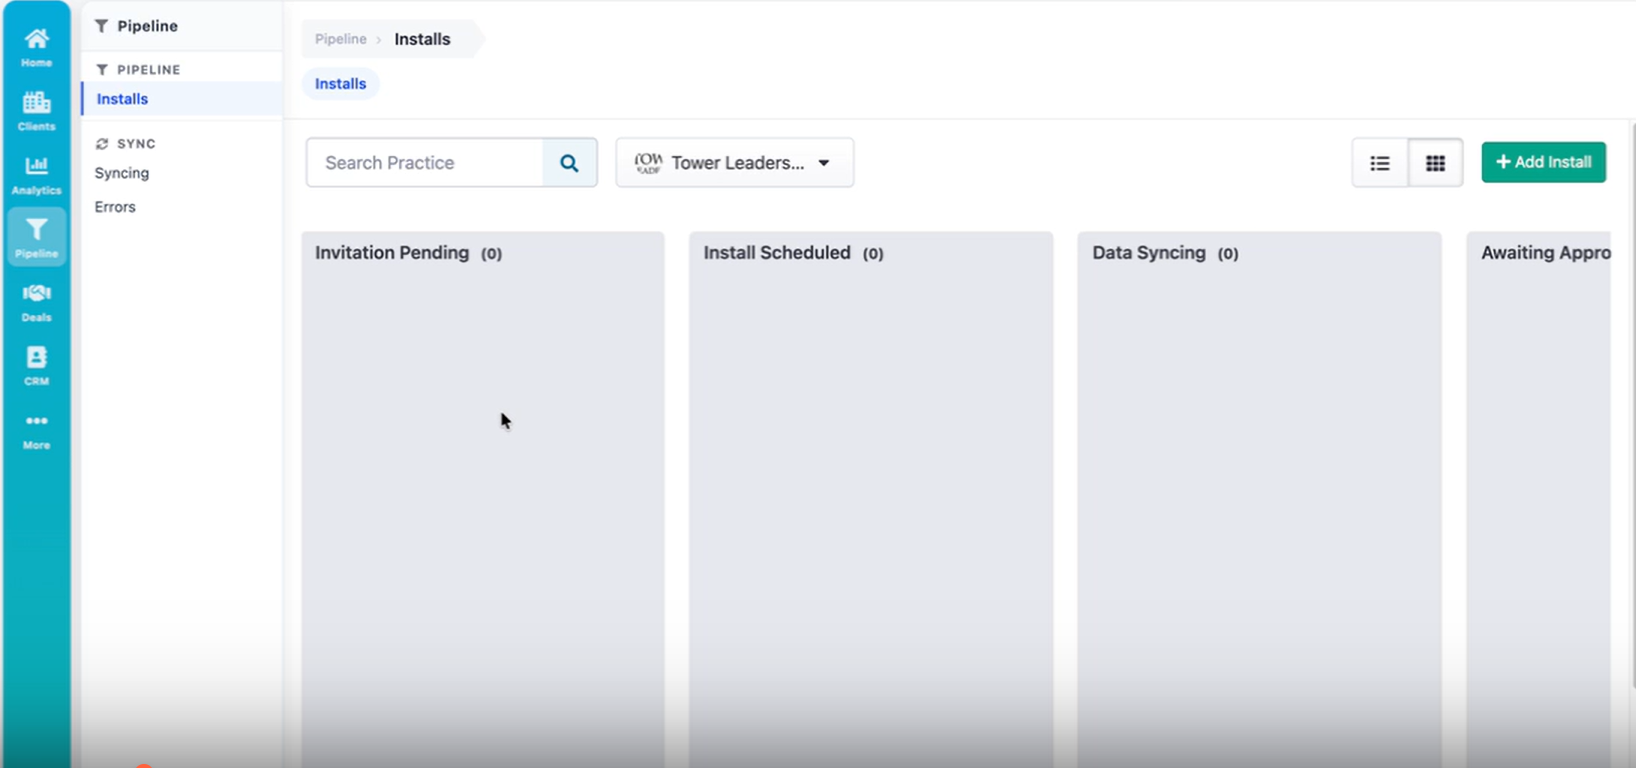
Navigate to the install pipeline
From your home dashboard, click Pipeline in the left navigation under "Analytics" then select Install.
Each client card moves from left to right as they progress through the installation stages.
Click "+ Add Install"
On the Install pipeline page, click the green + Add Install button in the top right corner. A modal will appear where you can enter the client's details.
Fill in the client's practice information
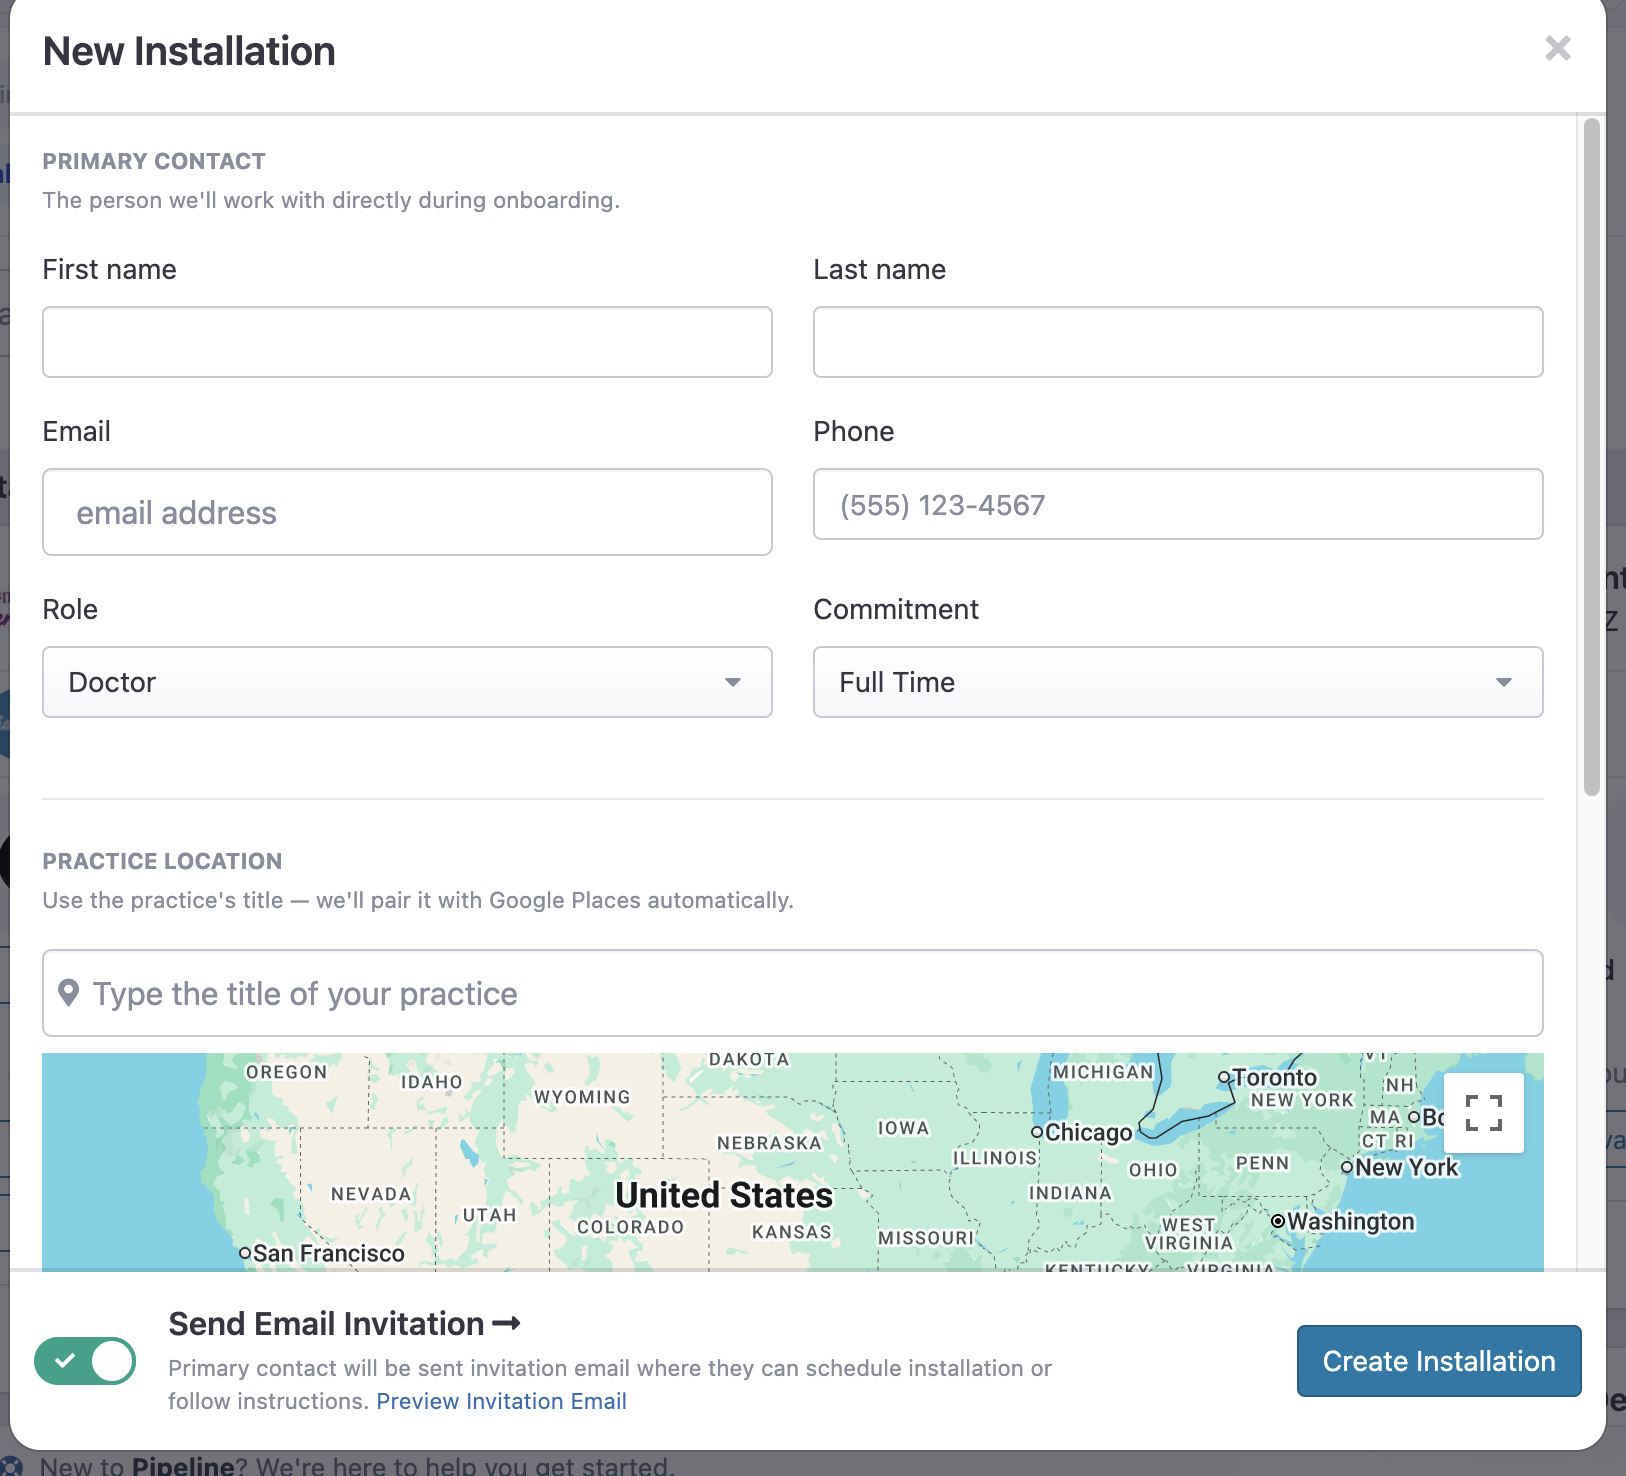
Complete the form with the practice's details
Primary contact | The decision maker — the dentist or practice owner. |
The decision maker's email address. | |
Phone number | Personal or office number. The office number is often more helpful. |
Role | Their role within the practice (e.g., Owner, Practice Manager, Lead Dentist). |
Practice name & address | Use the EXACTaddress. Many practices share the same name, so accuracy here ensures the right location gets onboarded. Google picks this up and geolocates them. |
Software type (PMS) | Optional The practice management software they use, if known. Will help install go quicker |
Fill out the client info on the modal that appears, including primary contact, email, and phone, software type, and any notes. Please make sure the practice name and location is correct. You can also add staff members from your company as a part of their growth team here. Whoever you add as a team member under growth will have visibility into their dashboard.
Tip: In the notes field, include the office manager's name, email, phone number, and any technical contacts. The more detail you provide, the faster the installation team can get the client onboarded.

Assign growth team members
In the Growth team section of the form, add the people on your side who should have visibility into this client. Only the people added here will be able to see this client's information and dashboard — this keeps each team member's view focused rather than overloaded with every client across the company.
Once all fields are complete, click Create. The client will immediately appear in the install pipeline and the TeamCare installation team will begin the process.
You're all set! The client has been added and the installation process is underway.
Manually Sending the Invite
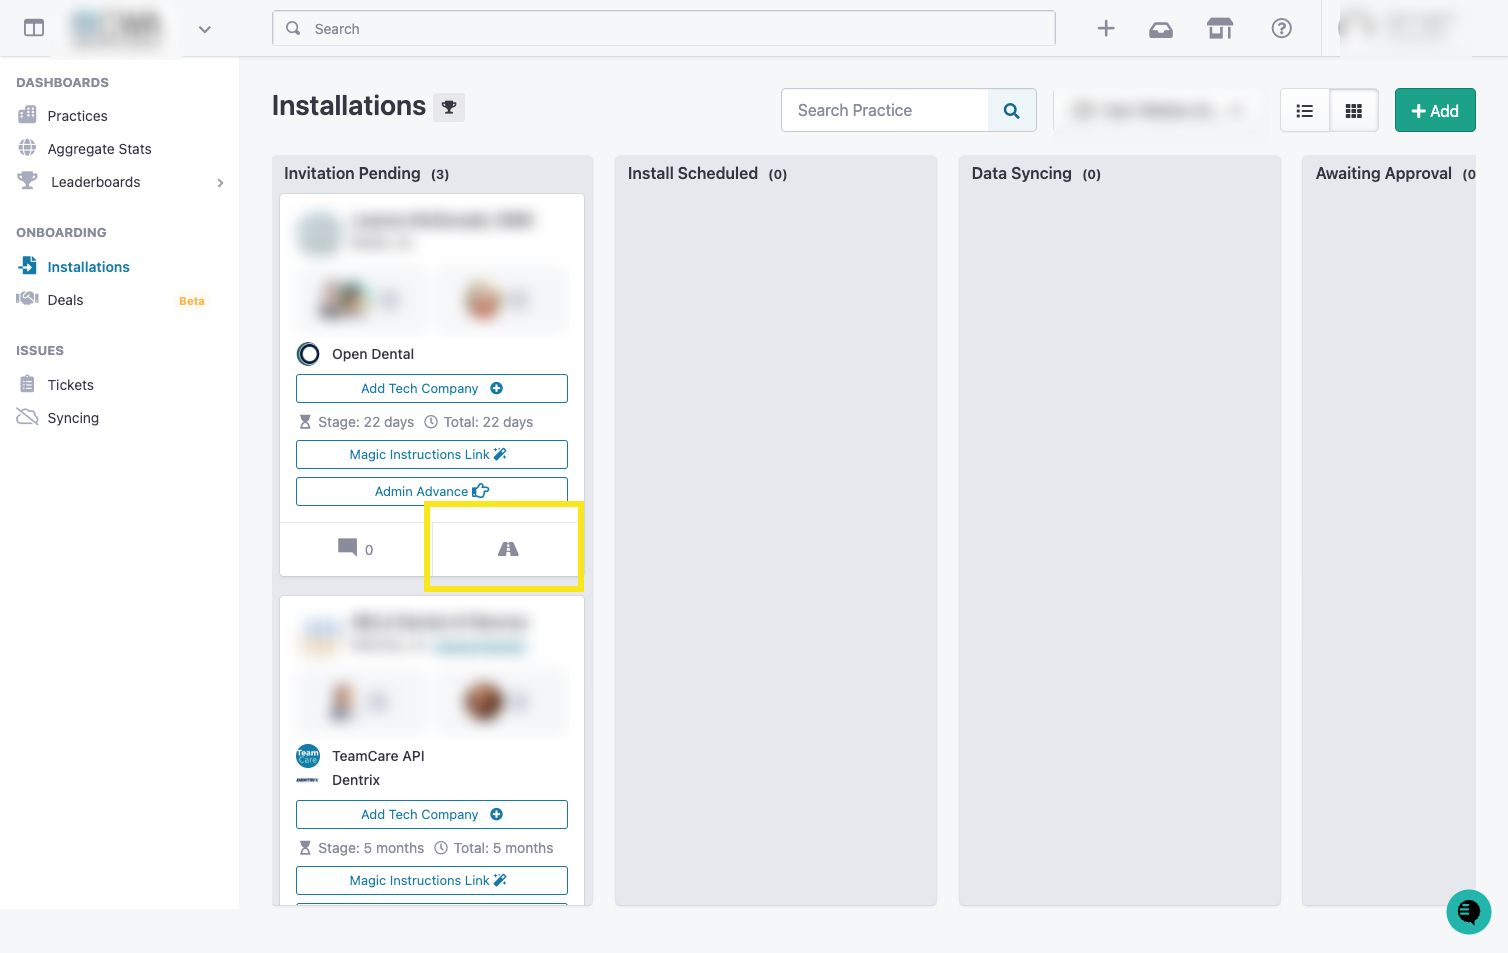
If you disabled the automatic toggle, the practice will appear in the "Invitation Pending" column of your Installations board. When you are ready to reach out to the client:
Locate the practice card on the Installations board.
Click the Timeline/Details icon (the road icon located at the bottom of the card).
In the Invitation Pending section, you will see the status "Not Scheduled."
Click the green "Re-Send Invitation" (or "Send Invitation") button.
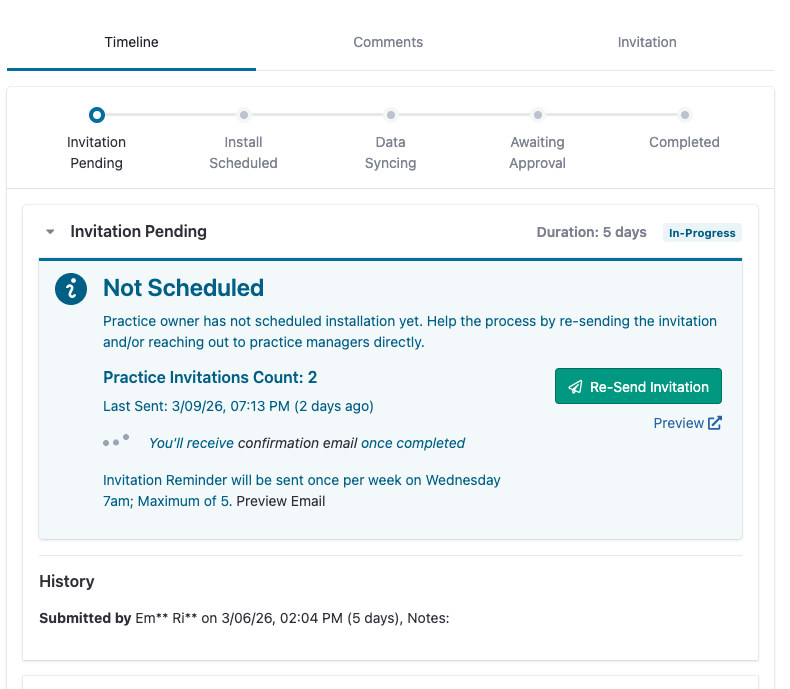
Note: You can click "Preview" next to this button to see exactly what the client will receive.
Below is a sample of the email that will be sent to your client. Note: all items in purple will be replaced with YOUR FIRM's name, logo, email, representatives, etc.
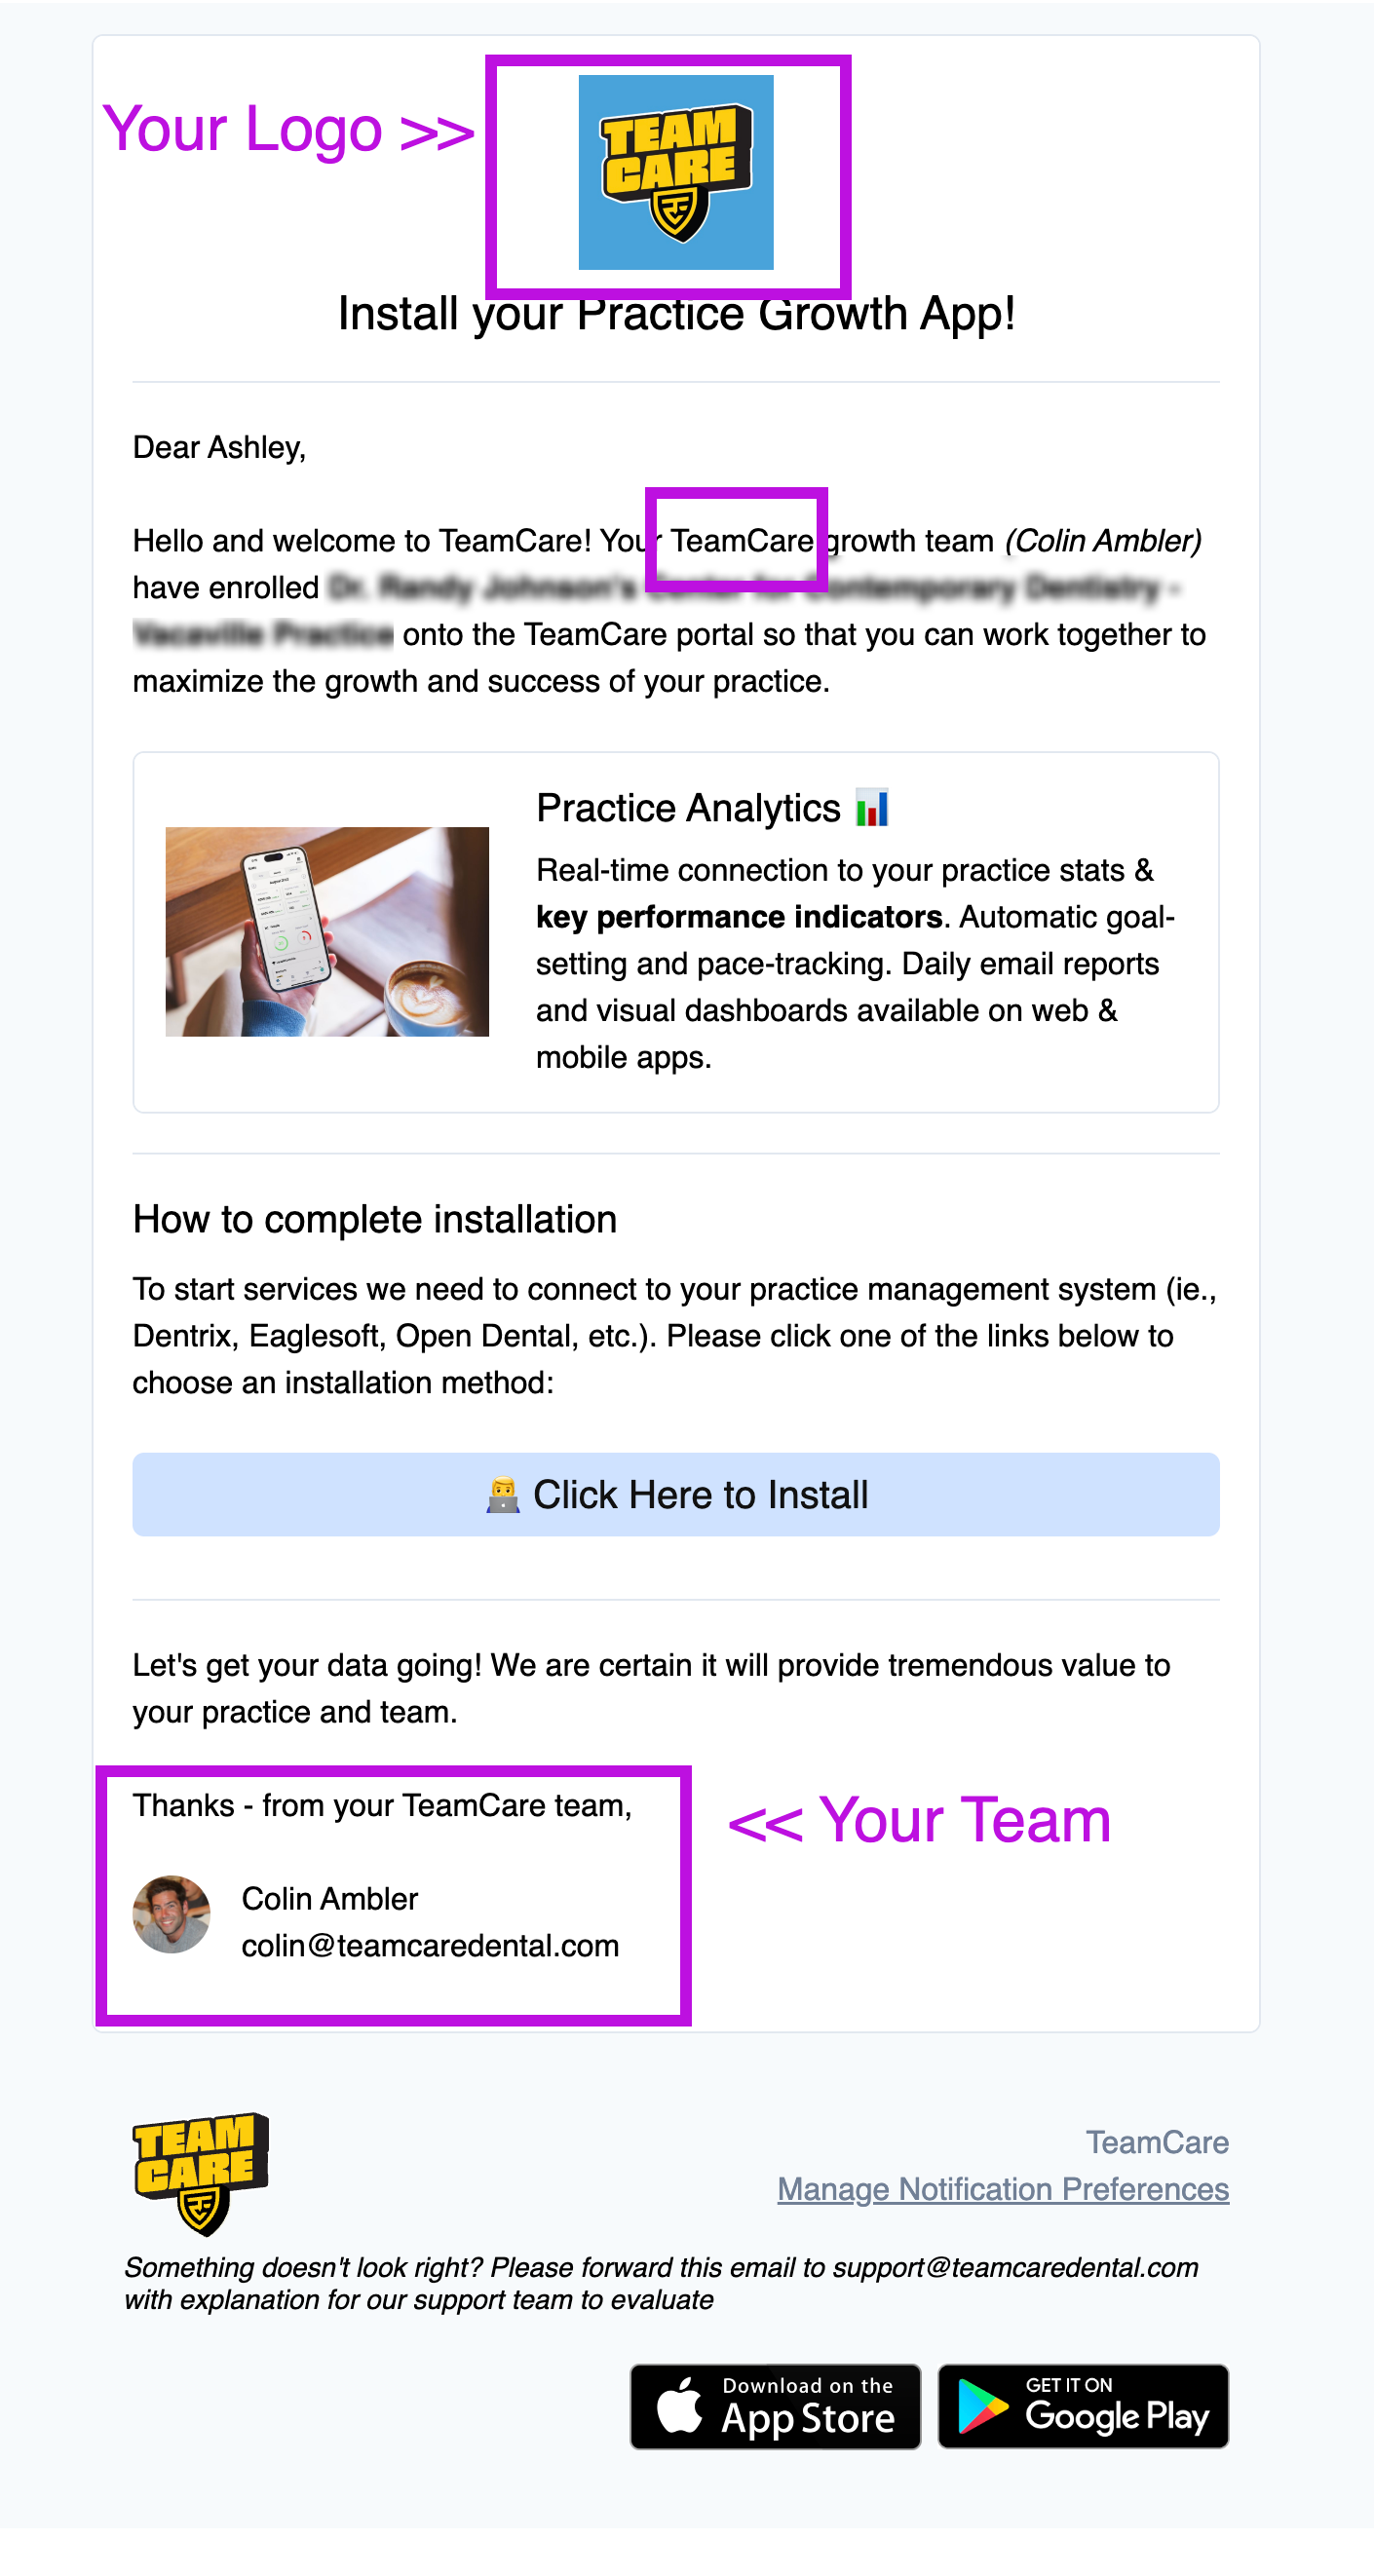
The system will now track the invitation. By default, a reminder will be sent once per week on Wednesdays at 7am (up to a maximum of 5).
Syncing
Can take several hours depending on the size of the practice.
After Sync
You'll receive a final "data review approved" from our quality control team.
Your practice managers will receive an invitation to join their account